Something to cheer us all up, a delicious home made lemon meringue pie recipe. And home made means far more nutrition than anything you’d buy from a shop.
I’ve brought together my favourite sweet pastry recipe, based on an old Nigella Lawson staple in her 1998 book, How to Cook and a BBC recipe that can be found on the internet. However, both recipes tend towards the fussy. This dish requires the production of three separate dishes, the pastry base, the lemon filling and the meringue topping, so it is fussy enough already without requiring the addition of further rigmarole. To be suitable for these times, I’ve stripped it back to the essentials. This pie is my husband’s favourite food. So what better way to show my appreciation for his hard work as we face the trials of lockdown together.
The finished pie will taste delicious. The tart lemon flavour is a treat for the jaded palette. And perhaps more to the point, this recipe is filled with good nutrition. Compared to shop-bought pies this contains no E numbers, artificial sweeteners, cheap fats or thickeners. The recipe includes four eggs and wholemeal flour, which are both good sources of protein. The oranges and lemons provide vitamin C as well as beneficial fruit phytochemicals that help boost the immune system (even if that will be a little degraded by the cooking). Whilst I don’t often advocate quite such a sugary delight – a small portion won’t do you any harm at all. At home we cut the finished pie into 9 or 12 slices.
If you aren’t used to wholemeal flour in your cooking, then pastry is a good place to try it out. The flour has much more fibre and a far higher nutrient base that even fortified white flour. The slightly nutty flavour is pleasant and the lack of rise is an advantage in pastry and biscuits– where it can be a worry for bread or cakes.
Hygiene
Don’t worry too much about super cleanliness in the kitchen as you make this pie. The whole thing goes into a hot oven at the end of the process, thus killing any pathogens, including the dreaded COVID-19 on the way. Comb and tie your hair back before you start. Wear a clean apron and wash and then rinse your hands before you start. The last thing you want is to clean your work surface with some dreadful chemical bleach which taints the pastry as you roll it out. Simply clean all surfaces and equipment before use with hot, soapy water and dry with a clean dish cloth or paper towel.
Pastry Case
Ingredients:
- 120g wholemeal flour
- 30g unrefined cane sugar
- 80g unsalted butter
- 1 egg yolk – retain the white for the meringue
- ½ tsp pure vanilla essence
Method:
Mix the sugar and flour in a bowl and rub in the butter, cut into small cubes until it resembles breadcrumbs (this doesn’t have to be perfect, if a few strands of butter still exist it will be fine)
Mix together egg yolk, a tbsp cold water and a pinch of salt.
Make a well in the centre of the flour mix and pour in the egg mix. Draw together with a spoon, adding a little more cold water cautiously, if required, to form a still slightly crumbly dough. Do not over work the pastry at this stage. Form into a ball and place in a plastic bag or greaseproof paper wrap in the fridge for 15 minutes. The raw pastry may be set aside in the fridge for up to 12 hours, to be completed later. I find it tend to dry out if left overnight.
Baking the pastry case:
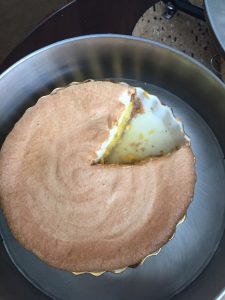
Remove pastry from the fridge. Roll out onto a lightly floured surface and form into a circle to fit a 23cm flan dish. I use an oven to table ceramic flan dish, which obviates the need to decant the pie at the end of the cooking process. But you can use a flan tin, in which case you might want to lift the finished pie out of its cooking tin, before serving.
You do not need to grease or flour a ceramic flan dish, but a tin will require a bit of grease and a sprinkling of flour. The sides should be about 2.5cm tall, high enough to accommodate the filling and a rim of pastry that will catch the meringue before it has had time to set.
Arrange the pastry in the flan dish, making cut and fill repairs if your circle isn’t perfectly even. Press down gently and squeeze together any joins. None of the pastry will be visible in the finished dish, so this is no time to be a perfectionist.
Cover with greaseproof paper or aluminium foil. If you have ceramic baking ‘beans’ use those to bake blind. I simply place on top of the paper a stainless-steel saucepan lid, a smaller flan tin or the loose flat base from a cake tin. This protects the base of the pastry from over cooking or rising, ad is much easier to remove than fiddly beans.
Bake in the centre of a hot oven 200C/180C fan/gas 6 for 15 minutes. Remove the weight and the paper/foil and bake, uncovered for a further 5-8 minutes, until the pastry is golden.
Set aside while you prepare the filling and topping.
Lemon Filling
Ingredients:
- 2 level tbsp cornflour or white flour (Wholemeal is fine, but you will see the flakes of the bran in the filling, rather than achieving a smooth lemony cream.)
- 100g unrefined golden caster sugar (any sugar will do)
- Finely grated zest of two large lemons
- Juice of two lemons plus juice of one orange made up to 325ml with extra water if necessary. (You can set aside the orange peel to be stewed in sugary water and used in sweet or savoury sauces if you like)
- 85 g butter
- 3 egg yolks and 1 whole egg
Method:
While the pastry bakes prepare the filling. This is an exercise in mindfulness. Do not let your attention be drawn by anything else while you cook the filling.
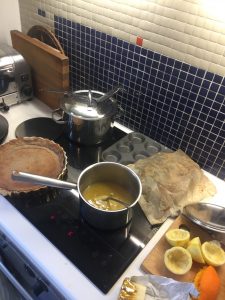
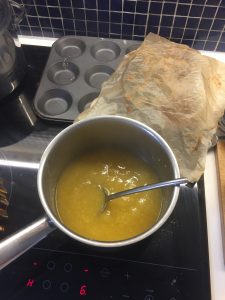
Mix 2 level tbsp white flour or cornflour with 100g sugar and the finely grated zest of two lemons. Strain the juice of the oranges and lemons into the saucepan and cook on a medium heat, stirring constantly until it thickens and becomes smooth.
Once the mixture bubbles, remove from the heat and drop in 85g butter. The butter will melt in quite easily. Then add the three beaten egg yolks together with one whole beaten egg to the slightly cooled mix. Return to the heat and stir vigorously over a medium heat for a few minutes until the mixture begins to thicken and resembles a thick custard. It will bubble, but doesn’t curdle. When the hot mixture begins to show the trail of the spoon as you stir, it is done. Set aside to cool. (It will begin to set)
Meringue
Ingredients:
The recipe calls for brown sugar, but in fact, any caster or icing sugar will do for the meringues. By using a golden sugar, the topping takes on a deliciously buttery hue. I don’t bother to use an electric whisk for this. Egg whites will whisk perfectly easily with a hand mixer, or even under the persistent whisking of a flat bladed knife. The secret of good meringues is a scrupulously clean and dry ceramic bowl. NEVER use a plastic bowl which can retain a taint of oil left over from previous uses.
- 4 egg whites (reserved from the pastry and filling preparation).
- 200g unrefined golden caster sugar divided into two halves
- 2 level tsp cornflour or white flour
Method:
Put the egg whites into a large ceramic bowl and whisk until the mixture forms soft peaks. Add half the sugar (100g) a tablespoonful at a time, whisking gently each time, without over-beating. Sprinkle the flour or cornflour over the mixture, whisk gently, then add the rest of the sugar, spoonful by spoonful, as before.
Making up
Re-heat the filling and pour into the pastry case. Immediately place spoonfuls of the meringue mix over the top in a circular motion, making sure that the meringues touch the sides and cover the pastry.
Return to the hot oven for about 20 minutes, until the meringue is crisp and browning slightly. Remove carefully. The mixture inside may be fluid, so the whole thing is vulnerable to being tipped too violently or being set out on an uneven surface. Let the pie sit cooling on a level surface in the tin for at least 30 minutes. You may then remove the tin, but wait a further 30 mins – 1 hour before eating. Cover with a fly screen if you have one.